
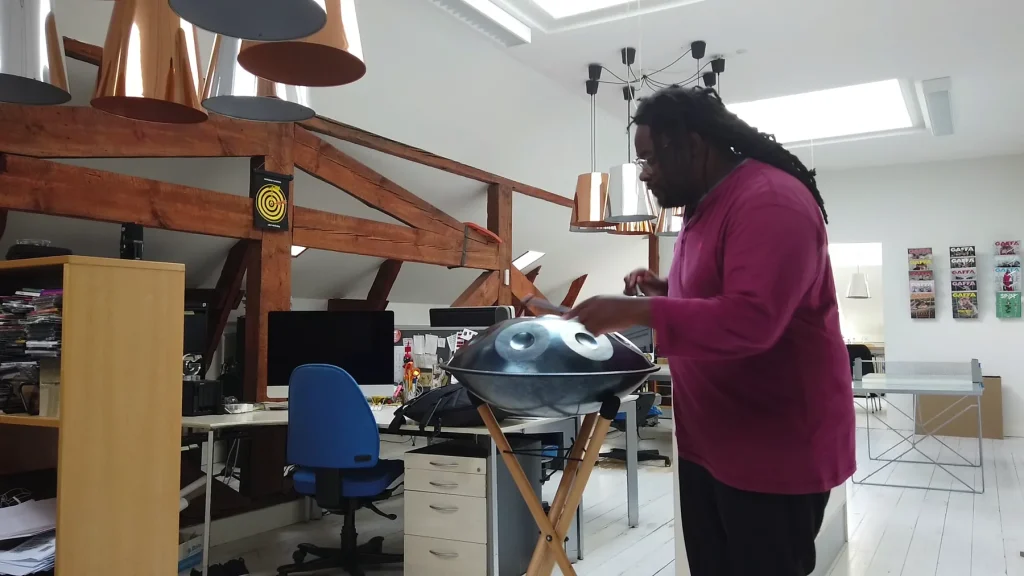
A practical guide to give your learning structure and rediscover the joy of playing. This article presents a clear method, practical steps, and overhead videos that show each movement without left-right confusion.
38,000 players already follow courses with step-by-step progression, a printable booklet, and intuitive notation using symbols and colors. You can access the courses on a computer, tablet, or phone, and a 14-day money-back guarantee lets you try them with confidence.
This article is for beginners and players returning to the basics. You will learn hand position, striking zones, a light touch, control of resonance, and your first musical patterns.
What this approach offers: a progressive method supported by reference videos and community feedback. For a guided start, see our practical guide and hear the difference after a few sessions.
First things first: hold and position your handpan for a clear sound
First things first, good positioning immediately improves your sound and playing comfort.
A stable seated position and the right chair height
Sitting on a low, camping-style chair helps your hips relax. Your knees should be slightly higher than your hips.
This position steadies the instrument on your thighs and prevents tension in your hands and shoulders.
Instrument orientation
Place the center note in front of you to guide your patterns.
Position the lower notes near your torso; the larger tone fields should be a few centimeters from your stomach.
Reach every tone field
Check that you can reach every note without moving your torso. Move only your arms and wrists.
Try a few angles and hand positions for 2 to 3 minutes to find the best rebound and a clear resonance.
- Avoid tilting the instrument too little, which may let it slip, or using a chair that is too high, which creates tension.
- Make small adjustments before each session: 30 seconds is enough to steady your position and improve your sound.
These basics also help during lessons: stable posture improves accuracy and reduces fatigue, making repetition more effective.
Playing basics: essential striking techniques for beginners
A beautiful sound often comes from a light touch more than force. Make a short, quick wrist movement so the surface can vibrate. Do not leave your finger resting on it: that muffles the resonance.
Where to strike: aim for the edge between the tone field and the dimple, brushing it with the last segment of your finger. The ding is the exception: you can strike it directly for a distinct attack.

Give each finger a role: use your thumbs for notes near your torso and your index and middle fingers for the others. Develop both hands by alternating left and right on the same note for better balance.
Useful percussive effects: the slap (flat fingers), tak (sharp strike), palm mute (palm on the ding), knock (knuckle), fist (used moderately), and ding shoulder expand your rhythmic vocabulary while keeping the music expressive.
- Short practice: play slowly for 5 minutes to feel the rebound, then speed up.
- Control: lift your finger quickly after each strike so the harmonics can ring.
- Care: control the force of stronger movements to protect the instrument.
To go further, see our practical guide to mastering essential techniques.
Learn to play the handpan: simple exercises to improve
Establish a clear routine. Play every area of the instrument at the start of a session to make the movement familiar and find the best striking angle.
The “every note” routine
Play every note at a slow tempo. Picture each position, then try striking the notes with your eyes closed when you feel ready.
Ascending and descending scales
Play the scale from low to high, then back down. Start slowly and build fluency without losing accuracy.
Simple chords and rhythms
Lightly strike two or three notes together, depending on your tuning. Focus on one rhythmic pattern at a time until you can play it confidently.
Controlled speed
Add finger rolls (rolls using 2 to 3 fingers) to improve speed and flexibility. Increase the tempo in stages and make short recordings to track your progress.
- Suggested practice block: 5 minutes per goal (notes, scale, chords, pattern, rolls).
- Use focused tutorials and repeat exercises regularly until the movements become automatic.
- Keep it musical: breathe between phrases and aim for simple phrasing.
Rhythm, timing, and consistency: a method that speeds up learning
A few minutes each day can establish good movements and a sense of tempo. Short, regular practice has more impact than long sessions far apart.

Practice a little each day: effective 10-minute sessions
Choose focused 10-minute sessions. Three or four sessions a week produce better results than one long session.
Goal: strengthen muscle memory, limit fatigue, and keep playing enjoyable.
Metronome and pulse: set a tempo and feel the groove before speeding up
Use a metronome to establish a steady pulse. Set a comfortable tempo and increase the speed only after you have mastered each step.
- Structure your time: notes, rhythmic pattern, transitions.
- Aim for basic proficiency after about 20 hours of practice if you play regularly.
- Combine listening and playing: imitate slowly, then speed up.
- Record your progress: tempo reached and repetitions played without mistakes.
| Duration | Frequency | Expected result |
|---|---|---|
| 10 min | Every day or 3 to 5 times a week | Better accuracy and retention |
| 1 hour | Once a week | Fatigue and slower progress |
| 20 hours total | Over several weeks | Basic proficiency |
Modern tools for learning online at your own pace
Online tools make repetition easier and help you understand movements visually. They combine immersive videos, intuitive notation, and downloadable resources to make independent learning clear and accessible.

Immersive overhead videos
The tutorials are filmed from above so your hands line up with the teacher’s. This avoids left-right confusion and helps you remember the movements faster.
Intuitive notation system
The notation combines symbols, colors, and numbers. Following these cues lets you play without knowing music theory and quickly recall patterns from the videos.
Printable exercise booklet
A PDF booklet accompanies each course. Print the exercises, check off your repetitions, and practice offline on any instrument with a center note surrounded by other notes.
- Flexibility: online courses available on a computer, tablet, or phone.
- Options: buy a course with lifetime access or choose an unlimited Pass with masterclasses, a community, workshops, and coaching.
- Peace of mind: one central site, clear prices, and a 14-day money-back guarantee.
Professional tips, mistakes to avoid, and instrument compatibility
Controlled movement often works better than force: here are professional tips and practical recommendations to preserve resonance and improve with confidence.
Striking zones: aim for the edge between the tone field and the dimple. Avoid heavy, direct strikes on the space between notes. Use the ding shoulder for certain effects, not for forceful strikes.
Avoid common mistakes. Do not leave your fingers resting on the surface after a strike. Avoid large, repeated movements that tire you and make your playing less clear. Control your energy: a light touch supports the harmonics and helps the instrument last.

Guided progress and community support
Following a structured method helps you overcome difficulties sooner. Courses provide a step-by-step path, focused feedback, and tools to measure your progress.
- Put sound first: learn where to strike and how to control your force.
- Ask the community for specific feedback and take part in workshops.
- Try a course with confidence: use the 14-day guarantee to see whether it suits your needs and budget.
Compatibility: these lessons work with any model that has a center note surrounded by other notes. Choose between a course with lifetime access and the Pass according to your pace and goals.
Conclusion
Regular practice and the right tools can quickly improve your sound.
Stable posture, accurate striking zones, and a light touch remain essential for clear notes and a beautiful tone on your handpan.
Move forward step by step: repeat the same movements until they become automatic, then increase the difficulty. By combining scales, chords, and patterns, you can move from the basics to your first melodies and rhythms.
With online courses, a printable booklet, and overhead videos, 20 hours spread over a few weeks can be enough to reach a basic level. Choose a method, plan short sessions, and enjoy playing.